Home

Forming Metals by Beating Down

Forming Metals by Beating Down


Forming Metals by Beating Down

  1. Different ways to beat down metals.
  2. Tools we use for beating down.
  3. Type of projects which you can make by beating down.

Beating down is a forming process in art metalwork where the centre of a piece of metal is stretched to form the bottom of the object. This method of forming is generally used for shallow forming operations. Examples of projects that are formed by beating down are nut dishes, candy dishes, ash trays and plates.
Two methods of beating down art metals are with form blocks, and over stakes.

Beating Down with Form Blocks

The easiest way to beat down metal is with form blocks, Figure 2. If the item is needed in small quantity wooden form blocks are used. If the item is needed in a large quantity metal form blocks are more durable. Wooden form blocks are usually made from close-grained hardwood such as maple or birch. Choose stock free of defects and use abrasives so the surfaces of the form are smooth. When making irregular shaped form blocks like the one in Figure 2, you can use a band saw and saw the pattern from 1 inch stock. Glue this to another piece of flat 1 inch stock. Another method is to use gouges, and hollow out the desired cavity.
After making your form block, consider what kind of metal you are going to use. Is the metal soft? Is it hard to form? The size of the metal should be larger than the area of the depression in your form because some of the metal will be drawn in during the beating down process. One rule of thumb used by many art metalworkers on depressions up to 8 inch in length, is to take the longest measurement and add the depth. If your circular shape is 7 inch long and 1 inch deep, you would use metal 8 inch across. This would mean that you would have 1/2 inch of metal on each side of the depression.
forming metals
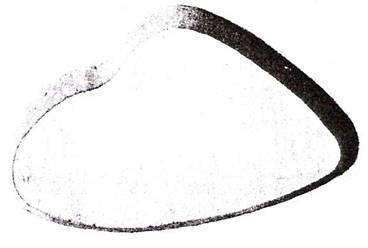
Figure 2 - Irregular-Shaped Blocks for Beating down Metal can be Sawed to Shape


Procedure for Beating down with Form Blocks

  1. Make the form block so the depression is the exact shape and pattern of the desired project. Round forms are easily turned on the lathe.
  2. Next, select and cut out the desired metal slightly larger than the area of the block, because some of the metal will be drawn down during the beating down process.
  3. Centre your metal on the form and fasten the metal to the form using No. 10 by 1-1/2 inch round head steel screws or 10 d nails at the corners of the metal.
  4. Select a hammer having the same contour as the sides of your form. When using soft metals such as pewter, zinc-based alloys and soft aluminium, use a soft hammer having a head made of wood, cellulose, horn, or rubber so you will not dent the metal. See Figure 3 and Figure 4.

forming metals
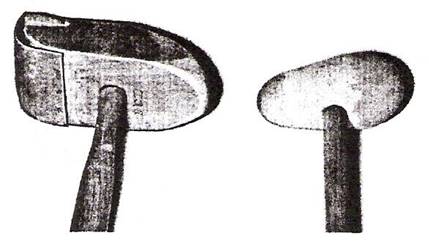
Figure 3 - Wooden Hammers are used when Beating down Soft Metals

  1. Place the form block on the workbench and mark the outline of the cavity with a pencil so you will know where to pound.

forming metals
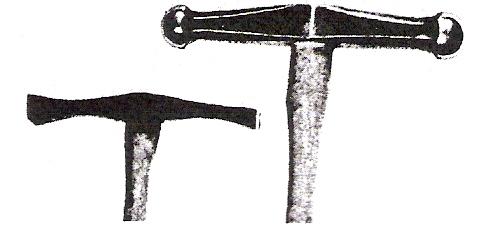
Figure 4 - Silversmith and Raising Hammers are Handy for Shaping Bowls and Trays


  1. Start striking the metal in the centre and then go counter clockwise toward the outside of the pattern, Figure 5.
    Hit the metal in the form block so the face of the hammer strikes the metal squarely. This prevents denting the metal.
  2. As you strike the metal in the form block, hold your elbow close to your side and rotate the form as you hammer. The cavity should be uniform in depth and fit the mould at every surface.
  3. If the metal hardens during the hammering operation, you must anneal the stock. Then pickle and wash the metal before re-fastening it to the form, so you will not beat the oxide scale into the metal. Repeat the beating down process until the metal assumes the exact shape of the form.
  4. Remove the metal from the form and cut it to the desired shape.
  5. File, apply abrasives necessary to smooth scratches, and finish as desired.


forming metals
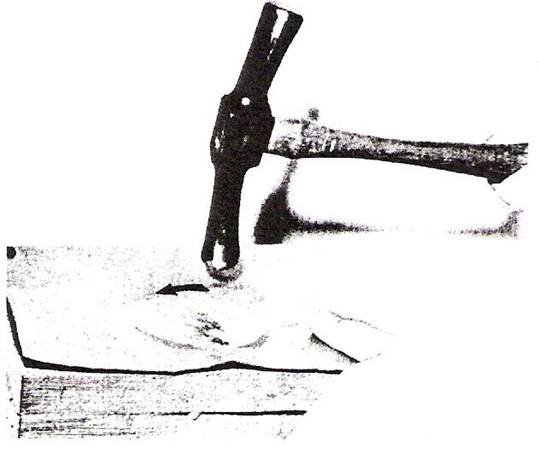
Figure 5 - In Beating down Metal you Should Work from the Centre toward the Edge


Beating Down over Stakes

Round and rectangular shallow shapes in art metal can be beaten down over stakes of wood or metal. Figure 6 shows a stake and a wooden forming mallet made from a cracked bowling pin. The hard maple from the bowling pin is durable and does not have a prominent grain that will mark the metal.
forming metals
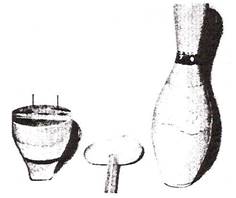
Figure 6 - Forming Tools made from Bowling Pin

forming metals
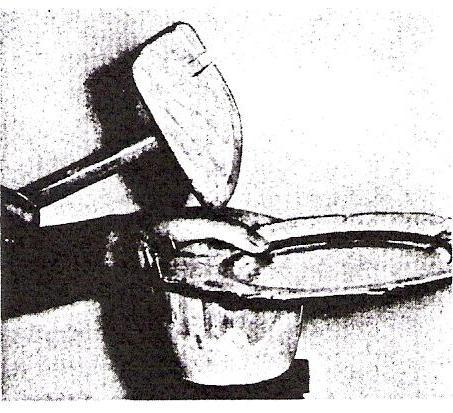
Figure 7 - Beating down over Wooden Stake


forming metals
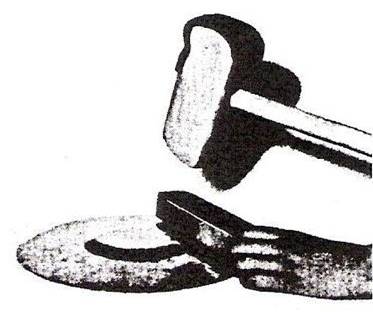
Figure 8 - Straightening Wrinkles with a Hardwood Block

Procedure for Beating down over a Stake

  1. Choose a stake having the shape you need for your project. This stake can be made of wood, or be a manufactured metal stake, Figure 9.
  2. Select and cut out your metal. Since no screws will hold the metal, additional metal must be figured when computing the amount of stock. One formula used by metalworkers is to take the longest measurement and add twice the depth.
  3. Put the stake on a stake table, or in a vice, and put the metal against the stake. To make a stake for beating down, cut a step identical to the depth of your project. Drive several nails in the block that will allow a uniform rim on your project.
  4. Choose the proper hammer and strike the metal against the step of your stake. Revolve the metal slowly in a counter clockwise position that slightly overlaps each blow. Keep your elbow close to your side when pounding.
    Figure 7, shows how to beat down over a wooden stake.
  5. If the rim of your project develops wrinkles, straighten them immediately. Turn the project upside down and put a piece of hardwood over the wrinkles, as shown in Figure 8. Strike the block with a hammer until the wrinkle disappears. Do not let large wrinkles develop on the rim of your project as they are difficult to remove.
  6. Continue pounding the metal into the form until the desired depth of the cavity is reached.
  7. Use a smooth surface plate or other flat surface and straighten the dents in your project.
  8. Use the proper abrasive materials on surface defects, then after cleaning, apply the finish.

Forming Metals by Raising

  1. How to form metal over a stake.
  2. How to form metal over a sandbag.


Raising is a forming process in art metalwork where the sides of the metal are formed to give shape to the project. The bottom of the project can be either rounded or flattened.

This method will enable you to do deep forming operations on metal. Bowls and deep oval or circular trays are projects that can be raised.

The two common methods of forming by raising are forming over a stake, and forming over a sandbag.

Raising over a Stake

Stakes are flat or rounded tools used in art metalwork for various forming, raising, bending, and planishing operations. Commercial stakes come in concave, convex, and flat shapes in a great variety of sizes. Wooden stakes are used when you do not have to have a permanent tool, or, when you need a stake with a special form. Woods that are durable for making stakes include birch, hickory, and maple. See Figure 9.

To make a wooden stake for raising, obtain suitable wood and hollow out a small circular recess about 2 inches in diameter and 3/16 inches deep. The hollowing operation can be done on a lathe, or you can use woodworking hand tools. Be sure the surface of the depressed area is sanded smooth. Figure 9 shows mallet and stakes that can be used for raising soft art metals such as pewter, zinc-based alloys, aluminium and copper. Raising hammers can also be used to shape soft metals.


Procedure for Raising Art Metal in Recessed Stake

  1. Prepare a stake with the proper recess for your project. Use either wood or lead block for this stake.

forming metals
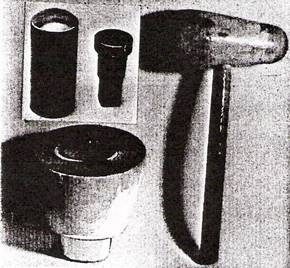
Figure 9 - Metal Stakes; Wood Stake and Mallet

  1. Estimate the amount of material necessary for your project. Figure 10 shows how to compute the amount of material. If the diameter of the base BC is 4 inches, the side AB is 2 - ½ inches and the side CD is 2 - ½ inches, we can add AB (2 - ½ inches) + BC (4 inches) + CD (2 - ½ inches) and we know we need stock for 9 inches in diameter. This distance can be measured with a rule, dividers or wire.
  2. Next, cut your disc to the proper size.
    Then draw a series of circles on the disc about ½ an inch apart as shown in Figure 11.

forming metals
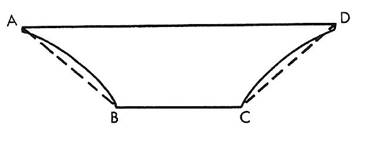
Figure 10 - Estimating Stock for Raising

  1. Put the outside of the disc on the recessed stake and strike on circle 1. As you strike the metal lightly with a rounded hammer, rotate the disc overlapping each stroke. Be sure to keep the metal at the same angle with the stake. Figure 12 shows how to hold the metal on the stake when raising.

forming metals
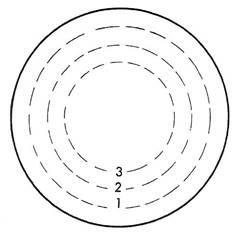
Figure 11 - A Series of Circles Serve as Guidelines

  1. After completing circle 1, pound the other circles in sequence.
  2. If the metal hardens during the forming process, anneal the metal.
    Then pickle and wash the stock before proceeding.
  3. Lower the angle of the metal to the stake as you move toward the centre.
    Use a template to check the shape of your project.
  4. After your project has attained its proper shape, you will want to remove dents and uneven surfaces by putting the concave surface of the bowl on a metal stake and hitting the metal with a hammer as shown in Figure 13.
    Choose a stake with the same contour as your project. The metal will stretch during the forming operation.

forming metals
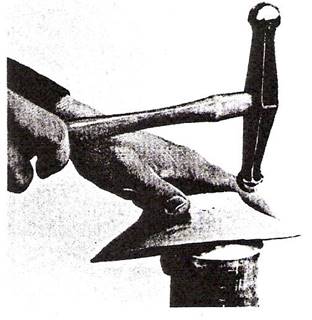
Figure 12 - How to use a Round Stake in Removing Dents


forming metals
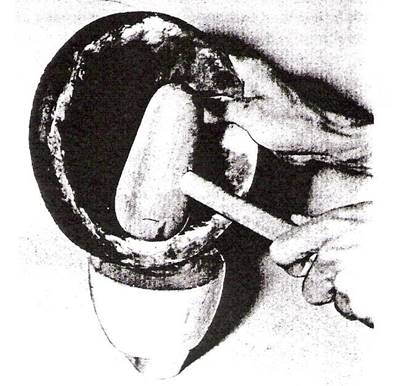
Figure 13 - Using Stake to Remove Dents from Bowl

forming metals
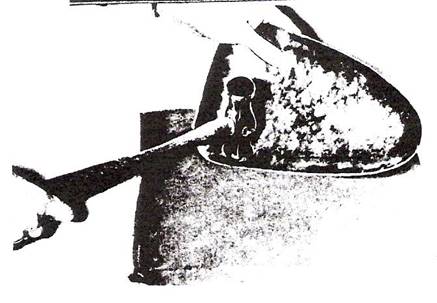
Figure 14 - Using Sandbag to Shape Large Project

  1. Use a surface gauge and mark the top.
    Cut and file the top edge.
  2. Use necessary abrasives and finish your project.

Raising over a Sandbag

Sandbags are used in art metalwork to form irregular shapes, and on large projects, Figure 14. A sandbag is flexible, enabling you to make a great variety of shapes.
Sandbags should not be solidly packed. This enables you to move the sand from one area to another, and shape the bag for nearly any desired contour.

Procedure for Raising Metal on Sandbag

  1. Choose and cut out the metal slightly larger than your pattern to allow for shaping the edges. Use estimating formula shown in Figure 10.
  2. Draw guide lines on the inside edges of metal, showing where you will begin raising.
  3. Place sandbag on workbench or other solid surface. Flex the sandbag so you have proper contour.
  4. Hold your metal so it is raised about 30 deg with the sandbag, Figure 14, and begin pounding the metal against the depressed area in the sandbag. Overlap each stroke as you revolve your metal. Work slowly from the guideline toward the outer edge going in circles until your project has acquired the desired shape. Anneal as necessary being sure to remove oxide scale from the metal before re-hammering.
  5. After using the sandbag to shape your project, remove any surface irregularities by pounding the metal against a properly contoured stake.
  6. Mark the top edge with a surface gauge, and trim the top.
  7. Remove surface defects with the proper adhesives.
  8. Stands for round-base projects can be made of metal, wood, or plastic. Metal bases can be soldered in place, while wood and plastic bases can be bonded with epoxy adhesives.


Note: Decorative work involves polishing of the brass and copper items. We use polishing mops made from stitched cotton mop with Tripoli and unstitched cotton mop with rouge.


Source: http://local.ecollege.ie/Content/APPRENTICE/liu/sheetmetal_notes/module6/Copper%20Rose%20Bowl_M6_U2.doc

Web site to visit: http://local.ecollege.ie

Author of the text: indicated on the source document of the above text

If you are the author of the text above and you not agree to share your knowledge for teaching, research, scholarship (for fair use as indicated in the United States copyrigh low) please send us an e-mail and we will remove your text quickly. Fair use is a limitation and exception to the exclusive right granted by copyright law to the author of a creative work. In United States copyright law, fair use is a doctrine that permits limited use of copyrighted material without acquiring permission from the rights holders. Examples of fair use include commentary, search engines, criticism, news reporting, research, teaching, library archiving and scholarship. It provides for the legal, unlicensed citation or incorporation of copyrighted material in another author's work under a four-factor balancing test. (source: http://en.wikipedia.org/wiki/Fair_use)

The information of medicine and health contained in the site are of a general nature and purpose which is purely informative and for this reason may not replace in any case, the council of a doctor or a qualified entity legally to the profession.


Forming Metals by Beating Down


The texts are the property of their respective authors and we thank them for giving us the opportunity to share for free to students, teachers and users of the Web their texts will used only for illustrative educational and scientific purposes only.

All the information in our site are given for nonprofit educational purposes


Forming Metals by Beating Down


Topics and Home
Contacts
Term of use, cookies e privacy


Forming Metals by Beating Down